Why Propane Inspections Matter More Than Most Techs Think
Propane is the most common fuel source for RV appliances — furnaces, water heaters, cooktops, refrigerators, and generators all run on it in most units on the road today. It's a reliable, energy-dense fuel, but it is also flammable, explosive under the wrong conditions, and capable of producing lethal concentrations of carbon monoxide when a burner or appliance isn't functioning correctly.
According to NFPA data, approximately 4,900 RV fires occur annually in the United States, resulting in 15 civilian deaths, 74 injuries, and $129 million in direct property damage each year. Propane system failures account for an estimated 18% of RV fires — making them the third leading fire cause in these vehicles, behind electrical faults and cooking-related incidents. Critically, 80% of RV fires occur while the vehicle is stationary, meaning the risk is concentrated exactly when propane systems are in active use.
As a technician, a propane inspection does three things: it protects your customer, it protects you from liability, and it documents the condition of the system so you and the customer have a clear record of what was found and what was recommended. This checklist covers every component you should inspect, what to look for, and the red flags that require immediate action.
Before You Start: Safety First
Before opening any propane system components, turn off all appliances, extinguish any open flames, and ensure no ignition sources are active in or around the RV. Check that the area is ventilated. If you're working indoors or in an enclosed garage, make sure exhaust fans are running.
Keep a calibrated propane leak detector on you throughout the inspection. Visual inspection alone misses leaks that are dangerous but not yet large enough to smell. A quality electronic leak detector will catch concentrations well below the threshold your nose can identify. Note that propane is approximately 1.5 times heavier than air, meaning leaks pool low — place your detector near the floor when scanning enclosed compartments.
The Complete Propane Inspection Checklist
1. Propane Tanks and Cylinders
- Tank age and certification date. DOT cylinders must be recertified every 12 years. Check the collar stamp. Tanks past recertification must be replaced before refilling.
- Tank condition. Look for dents, corrosion, rust, bulging, or damage to the valve guard. Surface rust is cosmetic; pitting corrosion or structural damage is a reason to flag the tank.
- OPD valve function. All portable cylinders manufactured after 1998 should have an OPD (overfill protection device) valve — a triangle-shaped hand wheel. If the cylinder has an older style valve without OPD protection, recommend replacement.
- Tank mounting and security. Tanks should be firmly mounted in their compartment or brackets with no movement. Loose tanks create mechanical stress on the connection and valve.
- Valve condition. Check for corrosion around the valve body and threads. The valve should turn smoothly without excessive force. A valve that sticks or feels rough internally may be failing.
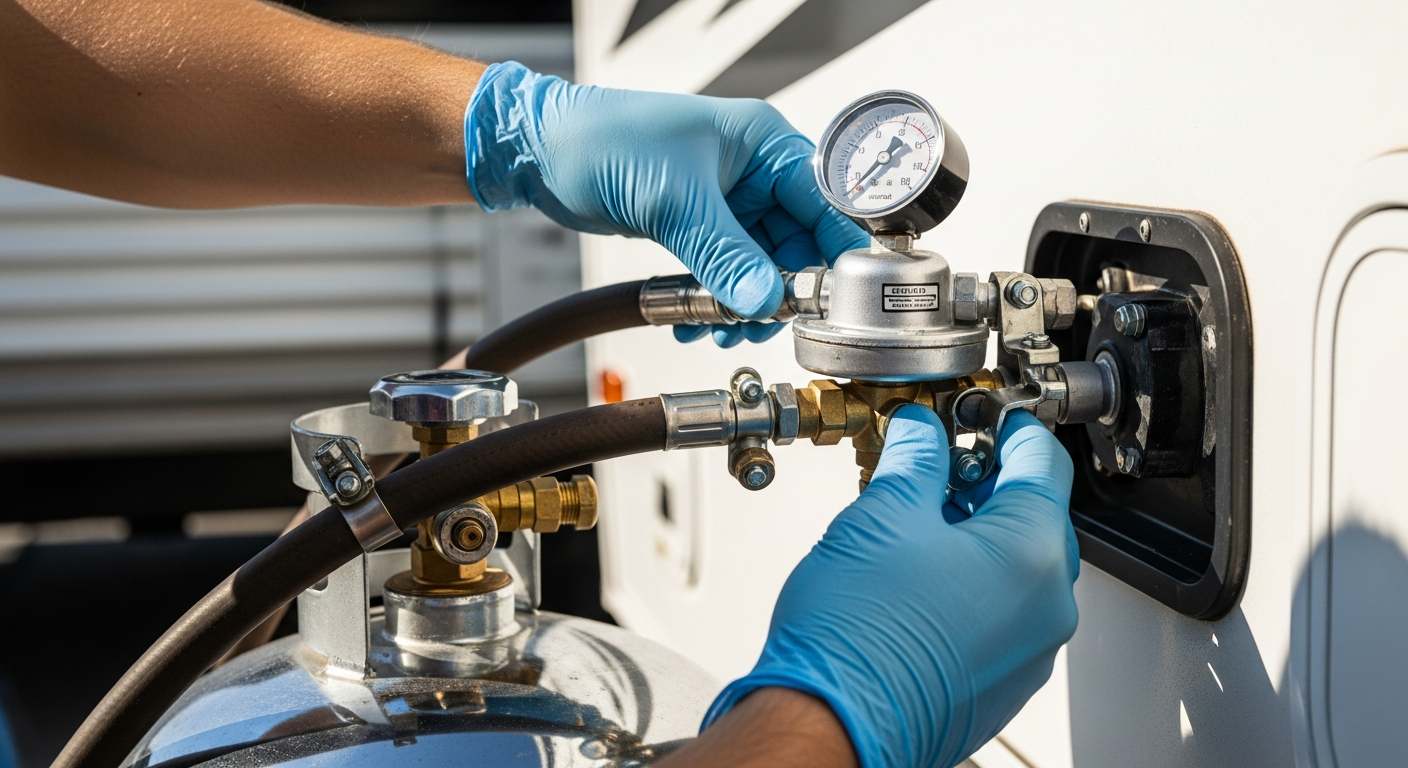
2. Regulator
- Regulator age. Most manufacturers recommend replacing the regulator every 15 years regardless of apparent condition. Check the date stamp on the body. Customers are often surprised to find regulators from the 1990s on their rigs.
- Physical condition. Look for cracks, corrosion, moisture intrusion, or insect nests in the vent port. A wasp nest in the regulator vent is more common than you'd think and can cause dangerous pressure surges.
- Vent screen. The vent should be clear and facing downward to prevent water intrusion. If the vent is plugged or missing, replace the regulator.
- Output pressure. With appliances off and gas flowing, outlet pressure should read 11 inches water column (±0.5 inches) for most RV systems. Use a calibrated manometer — not a guess. Pressure outside spec indicates a failing regulator. Note that at high altitude, regulator performance degrades approximately 10% per 5,000 feet of elevation gain.
- Pressure drop test. With the system fully pressurized and all valves closed, monitor pressure for 3 minutes. Any measurable drop indicates a leak in the system — find it before proceeding.
3. Supply Lines and Connections
- Flexible pigtail hoses. Inspect the pigtail hoses connecting the tank to the regulator. Look for cracks, kinks, abrasion, or brittleness. These hoses degrade with UV exposure and age — a hose that looks fine dry can crack under pressure. Replace any pigtail older than 10 years or showing any surface cracking.
- Interior copper or steel tubing. Inspect all visible supply tubing for kinks, corrosion, or abrasion at points where it contacts structure. Pay particular attention to grommets and pass-through points — these are common wear locations.
- Flex connectors to appliances. The flexible connectors between supply tubing and appliances (furnace, water heater, cooktop) should be inspected for cracks, corrosion, and loose fittings. These connectors are often in tight compartments and go uninspected for years.
- Fittings and connections. Apply approved leak detection solution (not soap) to every accessible fitting, valve, and connection. Look for any bubble activity. Use your electronic detector as a secondary check in areas you can't coat visually.
- Excess flow valve function. Some systems include an excess flow valve that shuts off gas flow if a line breaks. Test that the automatic shutoff valve (if present) closes properly.
4. Appliance Inspection: Furnace
- Inspect the combustion air intake and exhaust vent for obstructions — birds' nests, mud daubers, and debris are common
- Cycle the furnace and confirm ignition on the first or second attempt — repeated failed ignition attempts indicate a dirty or failing igniter, low gas pressure, or a faulty sail switch
- Verify the heat exchanger is intact — cracks in the heat exchanger allow combustion gases to enter the living area
- Confirm the furnace shuts off when thermostat setpoint is reached and the blower cycles down properly
- Check the drain port for condensate — blocked drains cause moisture issues inside the furnace
5. Appliance Inspection: Water Heater
- Inspect the burner tube for corrosion, spider webs, and debris — spiders love the warm, enclosed space around water heater burners
- Verify ignition and flame stability — the flame should be blue with minimal orange, steady, and extinguish cleanly when the thermostat is satisfied
- Check the anode rod (if equipped) — a significantly depleted anode rod should be replaced to protect the tank
- Inspect the pressure relief valve — it should open with a test lift and reseat cleanly; a weeping or permanently open PRV must be replaced
- Check the exterior door and surrounding area for black soot marks, which indicate incomplete combustion or back-drafting
6. Appliance Inspection: Cooktop
- Light each burner and confirm stable, even flame that is predominantly blue
- Check burner ports for clogging — spider webs and debris cause uneven flame patterns and incomplete combustion
- Inspect the valve stems for smooth operation and confirm all burners extinguish completely when valves are closed
- For ranges with oven components, cycle the oven and verify thermostat operation and flame stability during cycling
7. CO and Propane Detectors in the RV
- Test the CO detector using the test button and confirm the audible alarm sounds
- Check the CO detector manufacture date — most manufacturers recommend replacement every 5–7 years
- Test the propane/LP detector the same way; propane detectors are typically located low in the living area near the floor since propane is heavier than air
- Confirm both detectors are plugged in or have functioning batteries
Red Flags That Require Immediate Action
Some findings during a propane inspection cannot wait for a follow-up appointment. These are conditions that require you to shut off the propane supply and clearly communicate to the customer that the system cannot be used safely until repaired:
- Any active leak detected by electronic detector or bubble test
- Pressure drop during the closed-system pressure test
- Cracked or deteriorated flex hoses or pigtail connectors
- Soot or burn marks around any appliance vent or burner area
- Regulator older than 15 years with no documentation of replacement
- Missing, non-functional, or expired CO or propane detectors
- Any evidence of incomplete combustion (yellow/orange flames, soot) that cannot be resolved by cleaning
Documenting the Inspection
Documentation is as important as the inspection itself. A thorough paper trail protects you if a customer later has an incident and claims the system was never inspected, and it gives the customer a clear picture of what was found and what was recommended.
Your inspection documentation should include: the date, the RV make/model/year and VIN, a line-by-line record of every item checked with pass/fail status, photos of any items flagged, and a clear recommended action list with priority levels (immediate vs. recommended at next service).
With a digital work order system, all of this lives on the job record and can be shared with the customer as a PDF before you've even packed up your tools. When customers can see exactly what you found and what you're recommending — in a professional format with photos — they trust your recommendations and authorize repairs at a significantly higher rate.
If you're documenting propane inspections on paper or in your head, SymFlow's mobile work order system gives you a structured inspection workflow you can run from your phone and share with customers on the spot. Your first 30 days are free.
Sources & Further Reading
- RV Fire Safety: Expert Tips for Prevention and Emergency Response — Boondock or Bust (4,900 annual RV fires, 80% stationary stat)
- Propane Safety Statistics — Propane101 (injury and fire data)
- NFPA 58, Liquefied Petroleum Gas Code (2024) — National Fire Protection Association
- 2024 NFPA 58 LP Gas Code — Propane Education & Research Council (PERC)